Jan 16, 2024
Introducing: Tear-Away Hem Guide Tape
Our new Tear-Away Hem Guide Tape has just arrived, and we're exited to show you how to use it.
This tape is the go to product for creating beautiful and even narrow hems on those tricky light weight fabrics such as chiffon, organza and more. It is also the perfect interfacing for belts, waistbands and narrow cuffs due to its stiffness.
How to create a perfect rolled-edge hem with Tear-Away Hem Guide Tape
- Make sure your piece of tape is the same length as your hem, or a bit longer. This isn’t essential, but it will make it a lot easier.
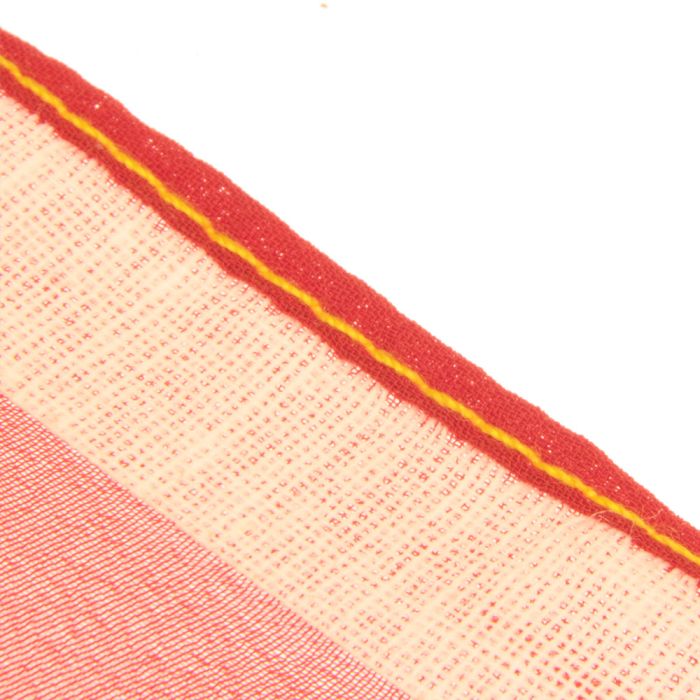
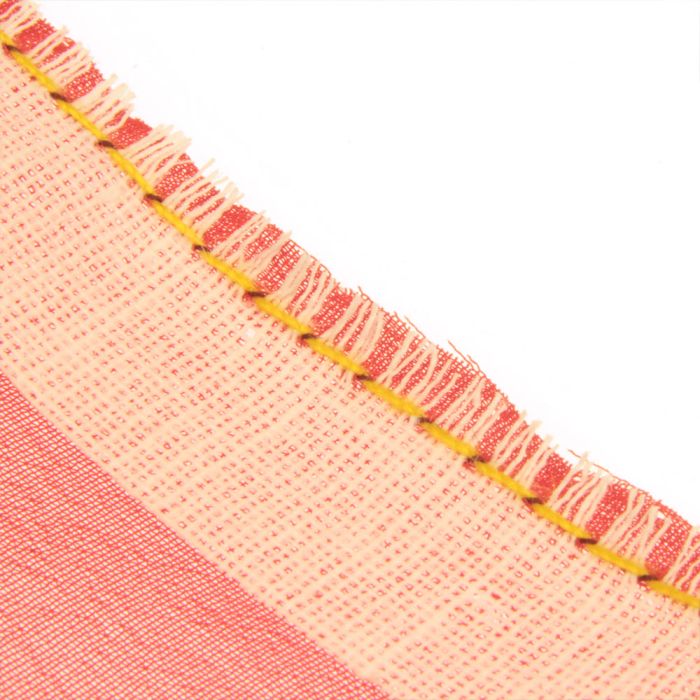
- Start by removing a few long “warp” strands of the tape that run parallel to your hem. You should remove enough long strands until the exposed “weft” strands are the same width as your desired hem.
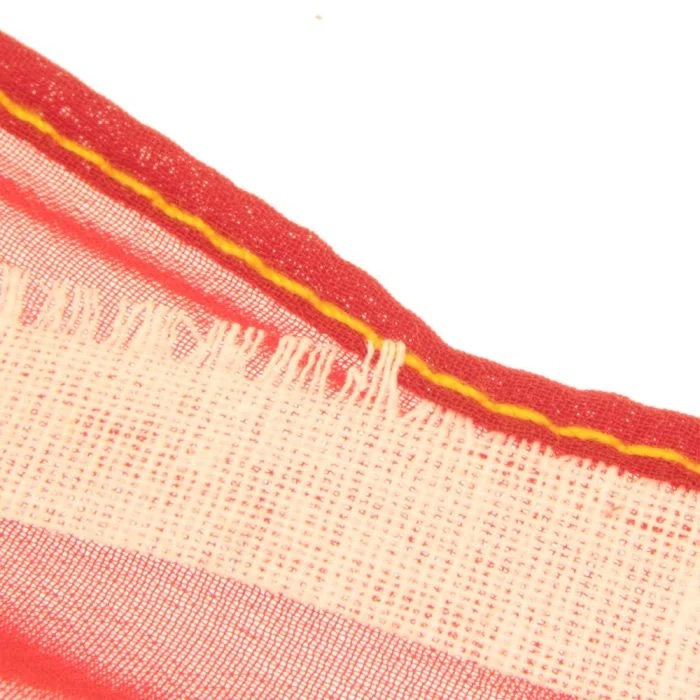
Tip: If the "warp" strands pull away on an angle or your remove too many and the exposed "weft" strands are not even you can simply trim the edge to even it out. - Line up the ‘frayed’ edge of your tape along the raw edge of your fabric that needs hemming. Place the tape on the right side of the fabric.
- Sew a straight stitch to attach the tape to the fabric - but only sew on the horizontal weft strands! Make sure not to catch any of the long vertical strands or this technique will not work.
- Gently roll the tape over, to the wrong side of the fabric. You are essentially using the tape to help you create a rolled hem. You can iron the fold in place to help.
- Stitch along the new fold, just as you would for a regular hem.
- Gently, pull out the tape. If you have not sewn any of the long vertical strands, it should pull out easily. (If it does not pull out easy you can carefully snip the caught strands.)
- Congratulations! You have made a beautiful hem.